Work In Progress report: painting of the baroque chateau is only a little forward of where it had reached when I last posted, a week ago. I spent four hours painting the base colour of the stonework in what I wanted to be a beige colour. Don't let anyone, not even an online chart of equivalents between the old and new Games Workshop paint colours, tell you that the modern equivalent of "Bleached Bone" is "Ushabti Bone". It actually comes out not so much beige as the sinister yellow-grey of late WWII German tanks. So four hours wasted. After a repaint it's starting to look nice though, and we modelmakers know that our efforts only begin to look good when they are 95% complete, so not long now! Time for some other stuff...
This post completes my record of the woods project I carried out in 2021. My previous approach to wargames woodlands was shown in a post "The Woods and the Trees", which you can find if you click on the Terrain label in the right-hand column. That method was to build "wood units" with a rigid base and a perimeter of bushes and small trees. That looks good and gives an impression of defending troops being under cover, but disadvantages made me rethink it. There were several issues. The wood units couldn't practically be put together to form a larger wood, never mind overlapped to give a different shape. You were stuck if you wanted a wood to go up the side of a hill, as they very often do in reality. Being about an inch thick, the perimeter of bushes formed a slightly irritating no-man's land in play terms: should you measure ranges from the edge of the wood or where a defending unit stood, a certain distance behind that? It was awkward if a unit's bases straddled the edge of the wood. And fiddlesome to reach down behind trees on the perimeter to get at a unit within. So I decided to make some perimeter-free wood bases, using the flexible felt approach.
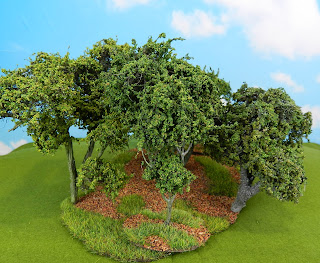
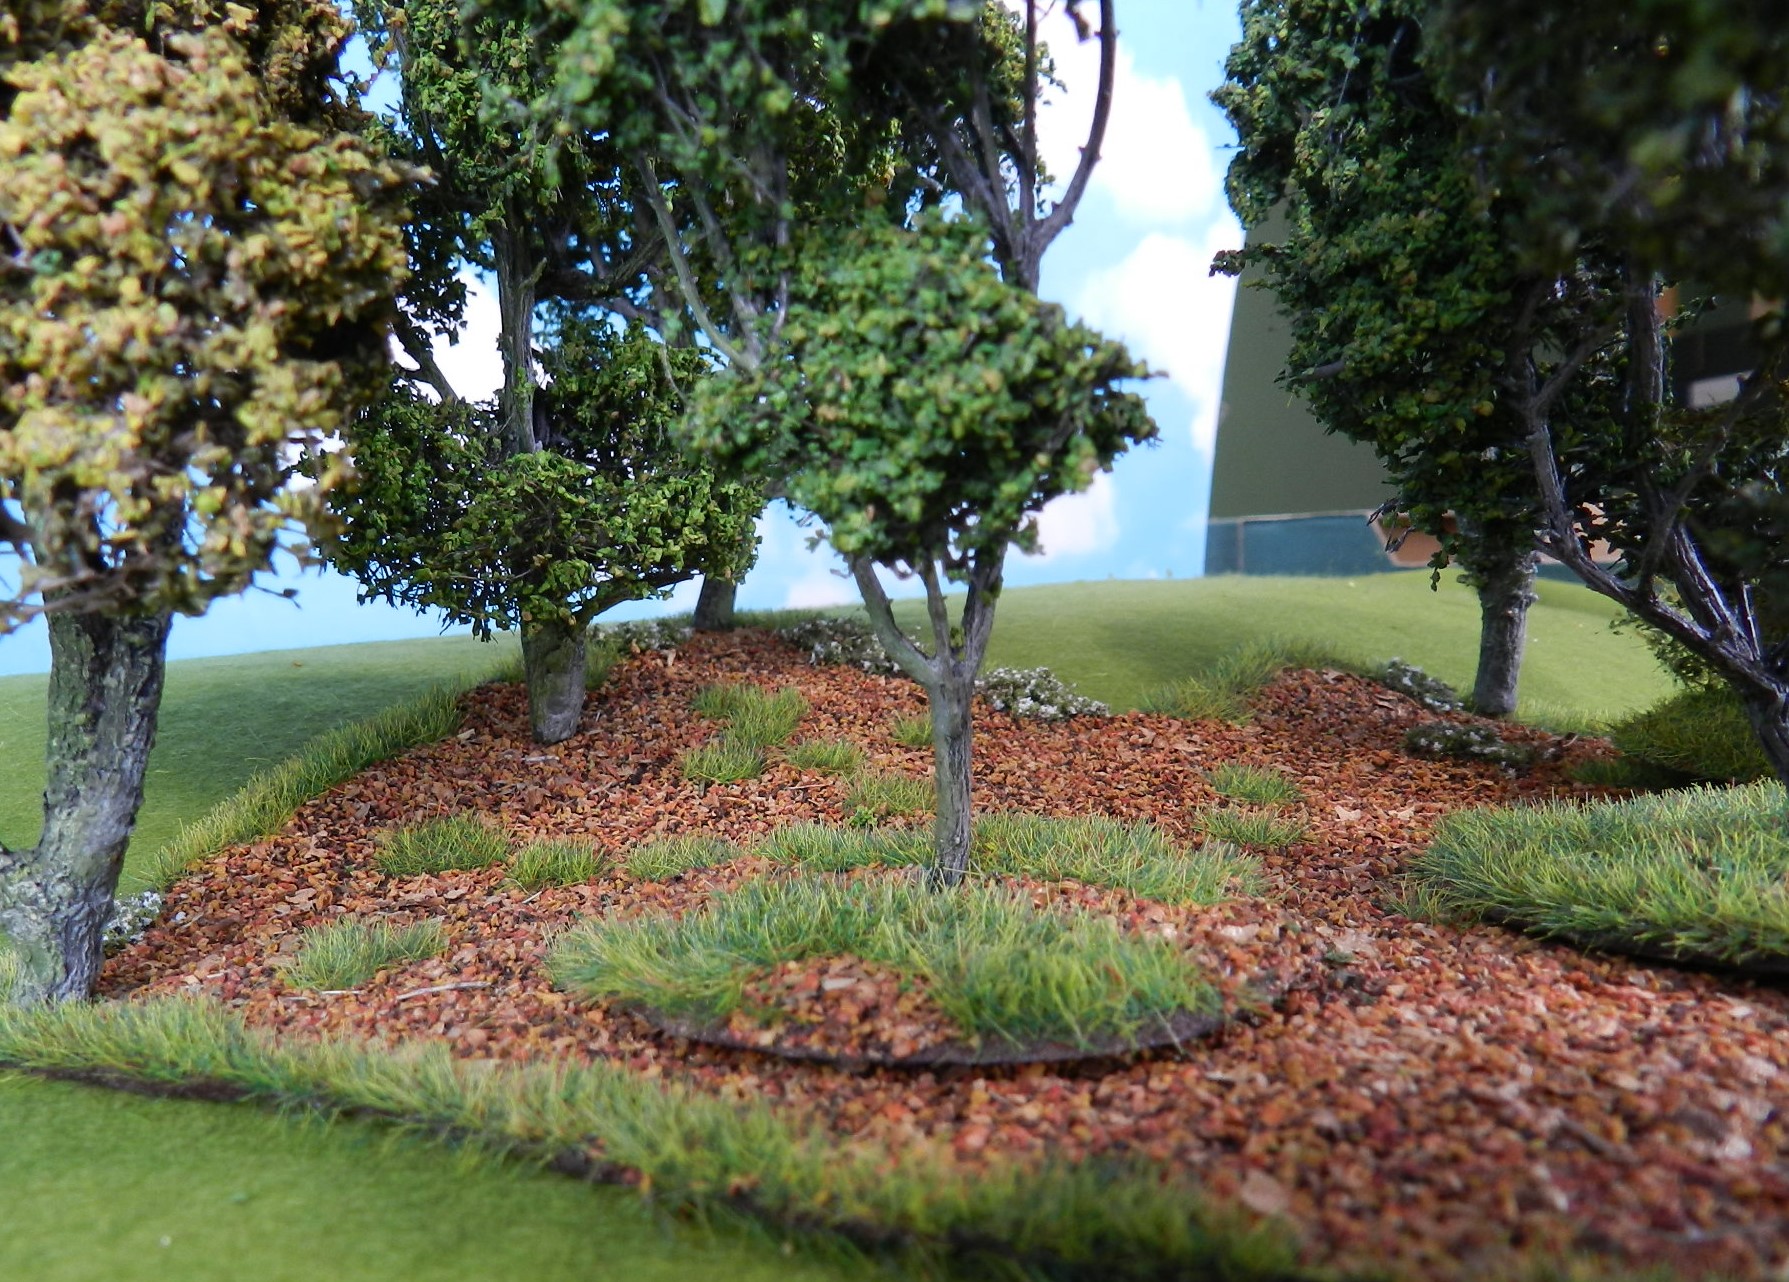
Here's the result. One big advantage is that this kind of wood base will lie flat on the board, whatever hills are underneath it. They can go on top of a hill, along the side or part on the flat, part on a hillside, as you see here. In real life, woods are situated disproportionately on hills, because the flat land is where you want to grow your crops. The tree models are a mixture of based ones and pin-fixed, as described in my last post. The pinned ones can be placed on the very edge of the base, where they are out of the way of figure bases and usefully serve to fix the wood in place.
If a unit of figures moves into the wood you just move any trees out of the way.It is still completely clear where the edge of the wood is in the game. A unit of figures which is partly in the wood and partly not presents no problem at all in play terms. I should have taken some photos with figures to illustrate this, shouldn't I?
I made twenty-odd wood bases like this, of all shapes and sizes. Some only fit one or two trees, more copses than woods, which you sometimes need to create a historical battlefield. All these bases easily store in a single shallow fruit-tray, because they all quite thin in section. A useful feature when laying out a game is that the bases can easily be overlapped to get a wood of a specific shape. Because they are thin, the overlap looks acceptable. Again I should have photographed an example of this, but you can see it with the based trees on top of the woodland surface.
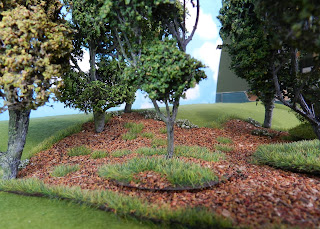
Most of the wood bases are covered in patches of grass and patches of leaf litter, which is what the interiors of woods are most commonly like. I made some of the bases with areas of weeds and/ or non-lurid flowers-see the tree bases below. The grass is fairly tall static grass, applied with my applicator. Leaf litter is a "witches' brew" of materials, stuck down with thin PVA. The main components are suitably coloured cork granules and the little leaf things you get from autumnal birch catkins, reduced in size by chopping with a rotary cutter. But the mix also includes sand, tea-leaves and chopped-up plant roots.
Lastly here's acouple of features used on some of the tree and wood bases. First come ivy, which uses foliage material from ModellNatur (left) and MIG (right). Both give a good impression from a normal distance but up close the fibrous material which supports the leaves is a little too prominent.
These two bases are covered in bushes and foliage serving as weeds. Both are from the Czech firm Polak, who make some really nice scenic stuff, although their UK agent's website is problem-ridden at the moment, so I'm not adding it to my Links section.


Lovely work John and for some bizarre reason, I hadn't thought of putting leaf litter down over most of my wood terrain bases. I think one reason might have been so that I could dual purpose them as open but rough terrain. With storage being an issue multiple use terrain items etc are really helpful in theis respect.
ReplyDeleteI haven't looked at the Ushbati Bone I bought to replace my Bleached Bone which is getting low but still has enough left in it for the moment. When I get the paints out I will check the comparison which might be OK in 10mm, if not I need to source another paint that is closer to the original.
Fantastic looking woods, John. The thing that really makes them "pop" to me is the leaf litter, which, as you say, is what the ground inside a wood or forest in mostly composed off. The red/brown colour of your "witches brew" is just right, too!
ReplyDeleteThanks for your comments as always, my loyal correspondents!
ReplyDeleteAs regards Ushabti, I thought the good old paint was a beige or creamy white colour, where the new one is darker and more yellow-grey. I got roughly what I wanted by mixing two parts white to one part Ushabti. So more or less added white would probably do the job for you, Steve, or there must be a match in other ranges.
The chateau is now up to the stage of touching up the paintwork, so hopefully should be available for posting in a couple of days now.
Very nice work - I've taken a few ideas from here. And sadly the new GW paints don't seem to match very closely to their old ones at all, and I have significant problems with them drying out too. I like the contrast paints though, I use them the way you used the old range of inks.
ReplyDeleteYou're right about the GW paints, Kym. I had some white "drybrush" paint, whatever they call it, and it dried into a solid lump in no time. I am trying the contrast paints myself at the moment. The dark blue and black ones aren't quite doing what they are supposed to as yet, ie not contrast-ey enough, but I'm going to experiment with different degrees of thinning. I did use the Flesh contrast paint over a coat of pale flesh colour and I must say it worked pretty well.
Delete