Showing posts with label Terrain. Show all posts

Sunday, 25 May 2025

Railway Lines

Back again with the fourth and for now final part of my recent project of building terrain pieces to complete the Franco-Prussian War battlefield. The first three parts were the earthworks, barricades and abbatis. In principle I aim to do three more such mini-projects and then I really will be done for this period. They would comprise (1) a couple of small masonry forts as featured in the battles comprising sorties from Metz and from Paris (2) a third chateau, this time based on a medieval castle and (3) something to represent vineyards. These projects may yet happen, but I've got other things to attend to for now. So my next model will be a master model for Bavarian FPW guns, as part of the Perry range. And then I need to move my actual wargaming boards forward a bit.

Before getting on to the construction process, a word about railway lines in nineteenth-century wargames. Few European railways except in the vicinity of a station or goods lines were built directly on flat ground. They were mostly either on more or less of an embankment or in a cutting. The effect of both would be to provide cover to infantry but to be impassable to cavalry, artillery, staff or even despatch riders. All these would have to look for the bridge or whatever where a road crossed the railway. In a game you could designate certain lengths of railway as being on the flat, on an embankment or whatever. But my preferred rule of thumb is to consider all railway on flat terrain to be embanked and all on a hill or slope as being in a cutting.

MAKING PLANS

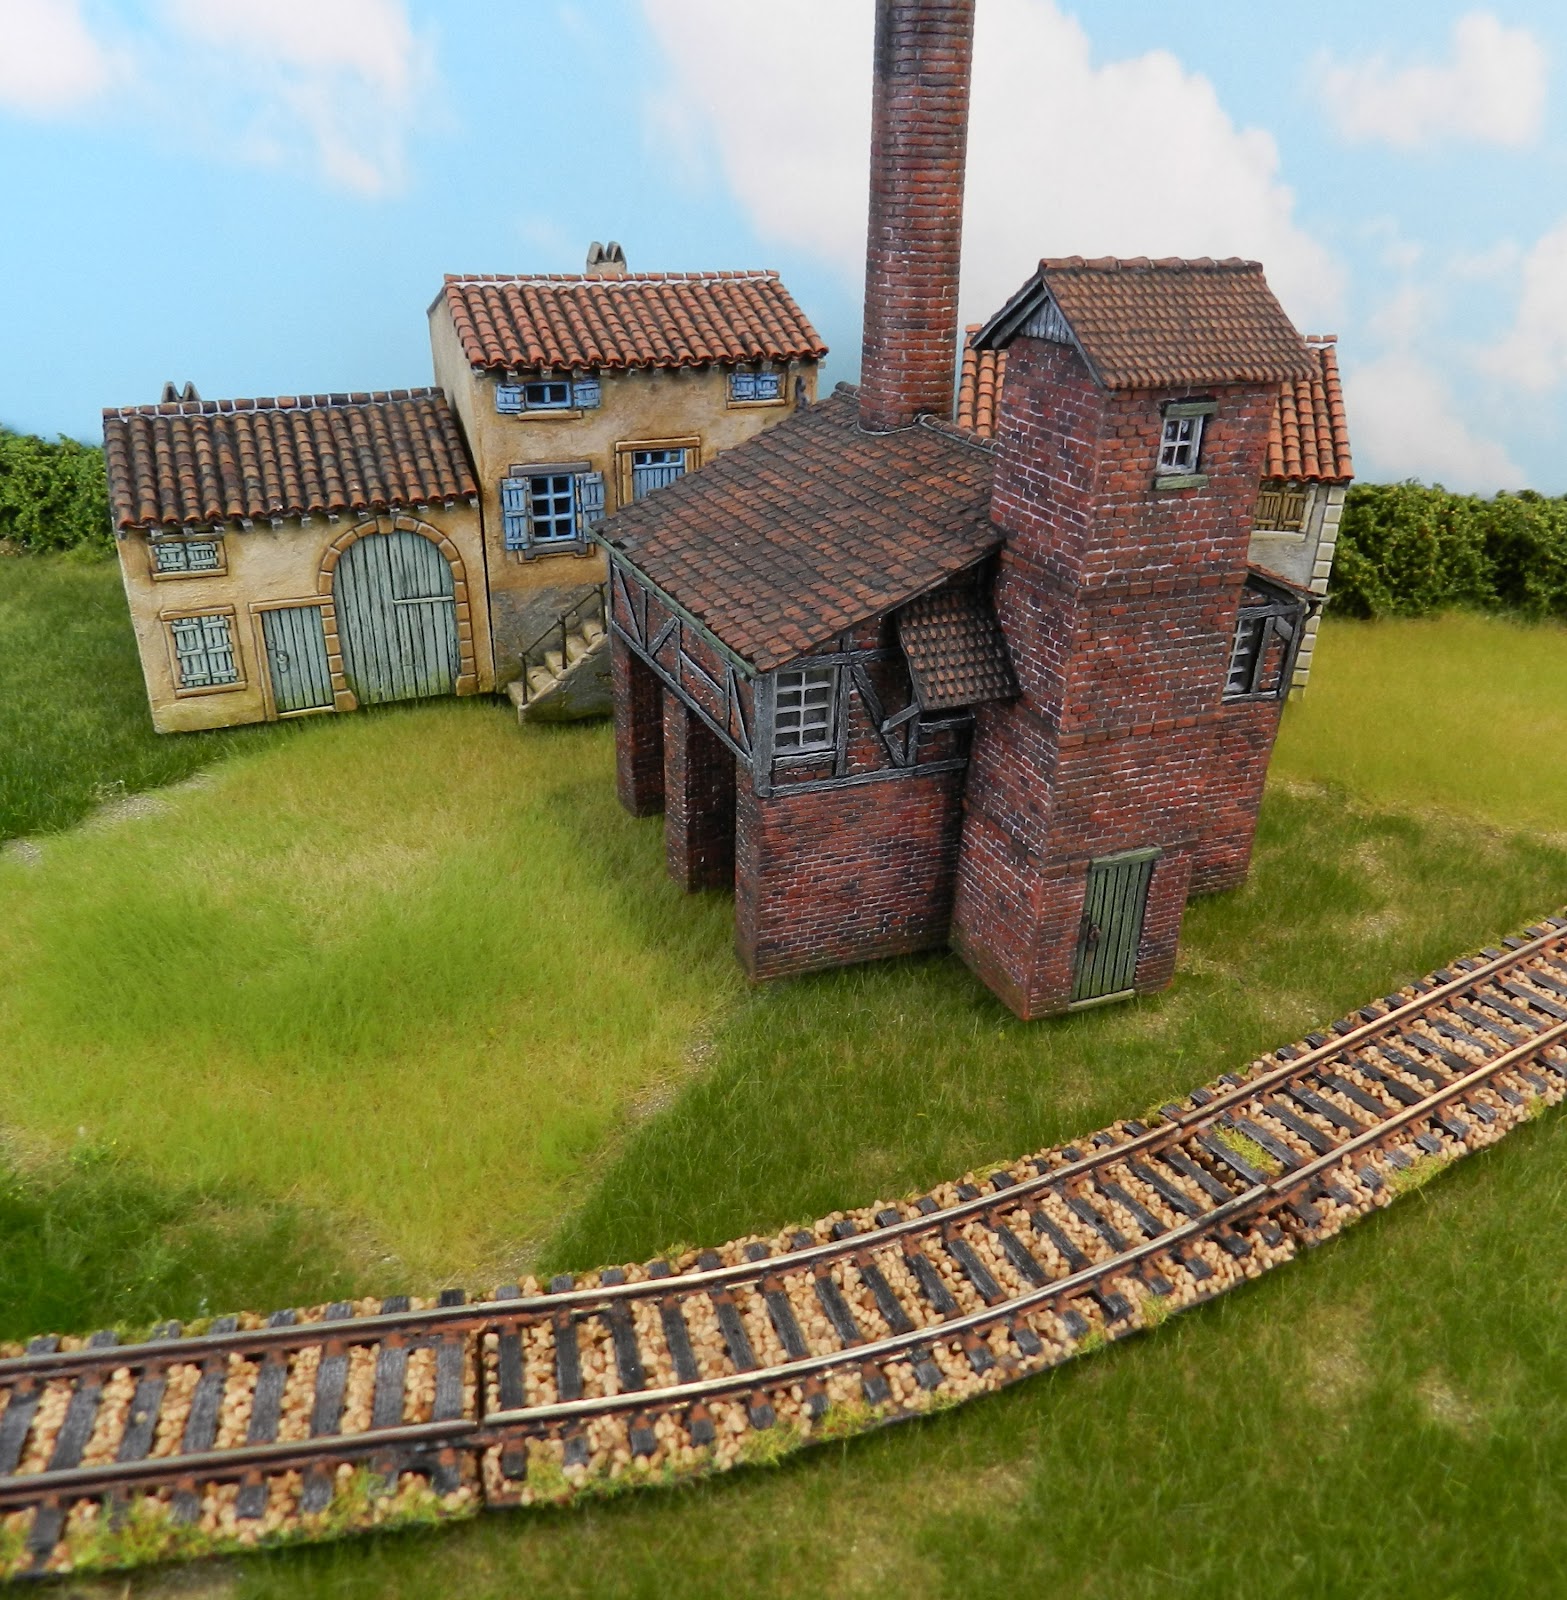
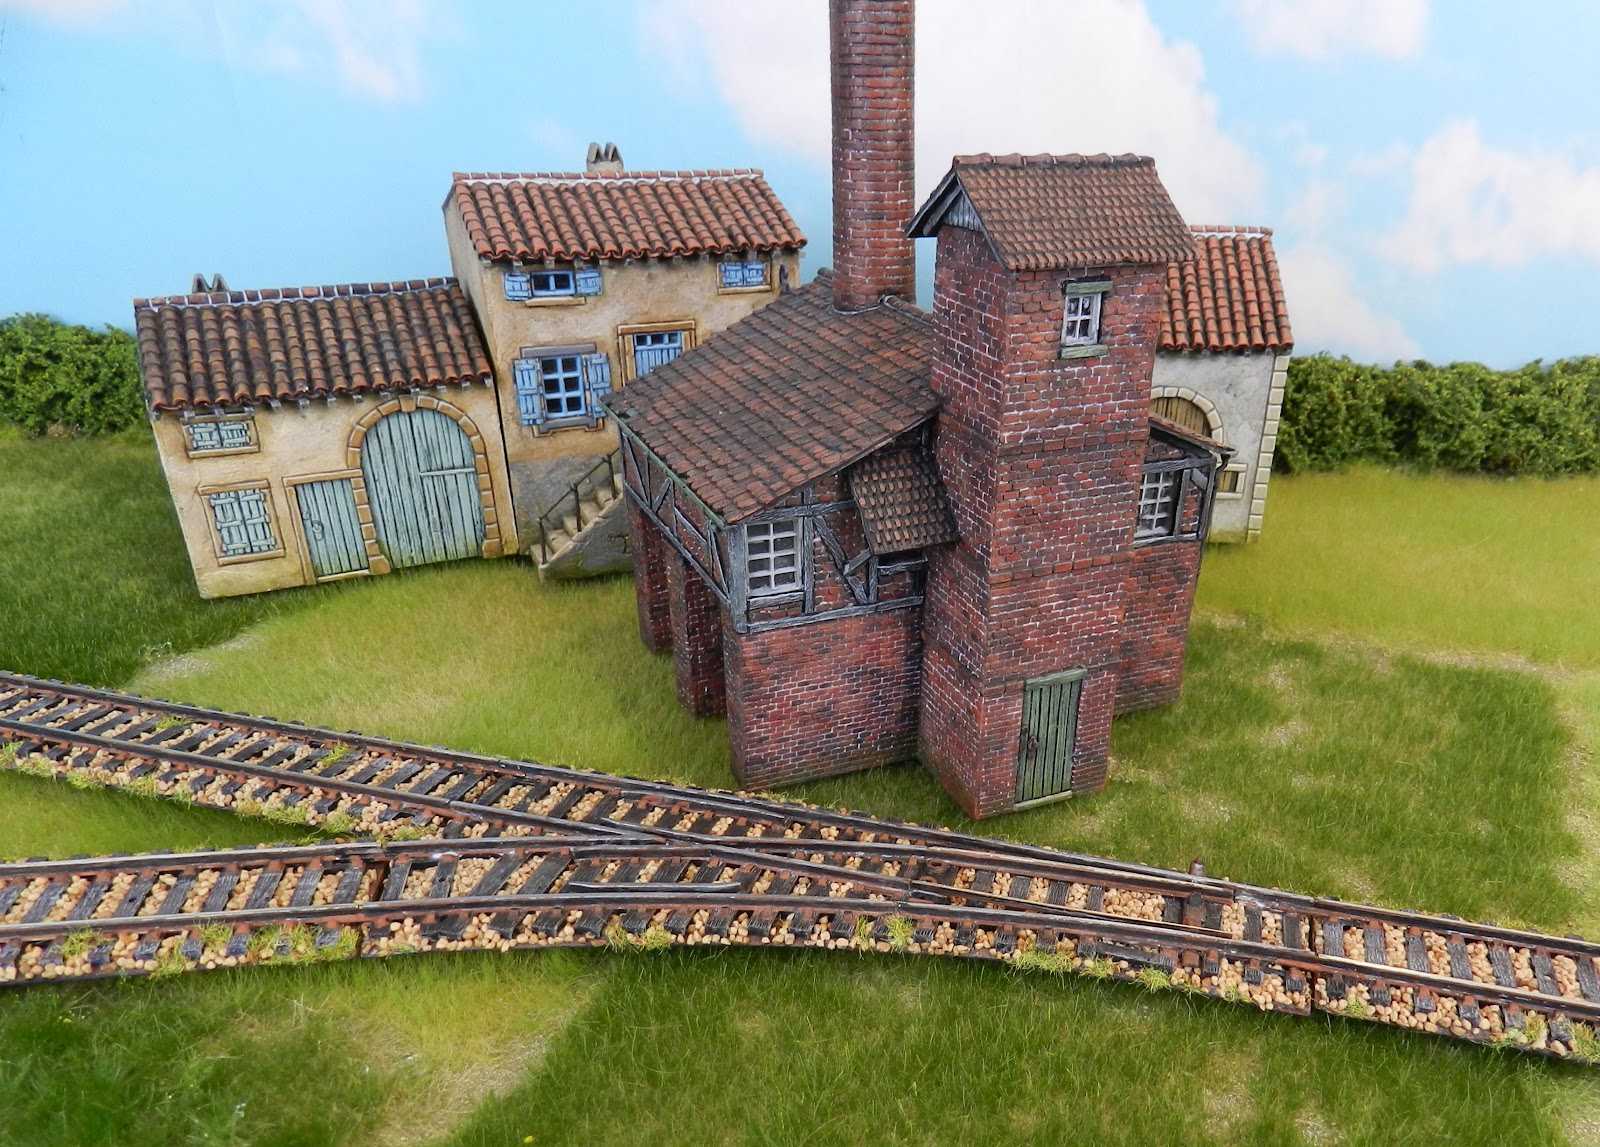
Anyway, here's the freestanding railway lines I've been building over the last six or so weeks. Railways crossed about half the battlefields of 1870-71, and I also wanted to cover what's needed for the battles of 1866 (and these will serve for other periods such as WWII).  As ever, the very first step was to work out how much railway line I needed, and any particular junctions/ points and sharp curves. To work this out I used the excellent, clear battlefield maps in Bruce Weigle's rulebooks. I decided I needed maybe 12 feet of straights and gentle curves, some specific curves sharper than railway modellers like to have, an 'X' junction and one or two 'Y' junctions. So about 16' in all, which is quite a length, but I foolishly thought this would be quite simple to make up, using Hornby 00 gauge track. But as regular readers know, I like to moan about how laborious most projects turn out to be, and this one is very much a case in point! I will talk you through the whole process, because you just might want to make some railway yourself and there are some pitfalls I hope you will be able to dodge better than I did.

So why 00 gauge railway, which is supposed to be 1:76 scale when our figures are about 1:56 scale, and might be more closely matched by the larger 'S' gauge, nominally 1:64? Two reasons: firstly there's the issue of compromising between figure scale and terrain scale, as with my "condensed" buildings, and secondly 'S' gauge model railways are more a US thing, hence expensive and hard to get hold of in the UK.

I did wonder about about all sorts of railway-related accessories with this project, but decided against all of them for different reasons. An actual train did puff its way onto one or two FPW battlefields, but modelling one would have been too much of a rabbit hole even for me. A station might have been feasible, but somehow I didn't want to go there just yet. I thought of buffers for the lines that end on the battlefield, but they would be a real obstacle to units on the table. I would have liked to do a couple of signals or indicator boards, just mounted on pins, but sadly couldn't find enough information about their form and colour to model them.

TRACK TROUBLE

The next step was to source the track sections that I needed. I was able to get straight sections, gentle curves and points second-hand on ebay, and purchased two metre-long sections of "flexible" track direct from Hornby. All this was a quite reasonable £51, even including postage. But other knick-knacks (see below) would come to another £50, which I wasn't expecting.

The basic method of construction was to use track sections as they came, or cut them to the lengths required, then base them on mounting card about 1.5mm thick. The width of the sleepers is 29mm and I allowed 2mm each side of that for a chamfered edge, so the bases are 33mm overall. The tracks stick down fine to the bases with UHU, so long as you rough-sand the underside of the plastic sleepers first. The rails are mild steel, but can be cut with a fretsaw or half-cut with clippers then snapped. In either case you will need to file the ends level and smooth. The ideal tool supposedly is the "Xuron track-cutter", sold for this very purpose, and it sounds tough, huh? But as an indicator of the troubles I was to have, mine actually snapped right in two! You wouldn't think this could happen, so I'm disappointed with this product.

The very sharp curves can be made with the flexible track sections that Hornby supply. Unlike the normal track sections the metal rails just slide out of the plastic web of sleepers and "chairs" (railway-speak for the little claws that hold the rails to the sleepers). The web will stick down to your base sections and naturally form an even curve. Now comes a tricky bit though. The rails being mild steel are very springy, so you have to bend them to a curve roughly corresponding to the sleepers and base. Do this with your hands and a pair of pliers, a little bit at a time but using as much force as necessary. It won't be a totally even curve but that's OK. The curved rails will now slide along into the chairs quite easily and you hold them in place with a bit of superglue.

I encountered my first really big problem with getting the ends of the bases to the right length. I made and glued them flush with the final sleeper of each section then found they really needed to be about 1.5 or 2mm longer, as do the tracks. The gap between each sleeper is 4mm, so this should have been obvious, but I missed it.So all the rails had to be torn off the bases, sanded clean, new bases made and stuck together a second time.

The next troublesome area was the "fishplates" as they call the little clips that join model railway track sections together. I could have left this aspect out and just had the sections butting up against each other, but I figured they might drift apart on the table, so I'd use the fishplates and have everything joining up nicely.. I needed to buy a couple of dozen of these little accessories, so looking into it I ordered a 24-pack of PECO OO/HO "fine standard" fishplates. These absolutely don't fit the Hornby track however, so were wasted and I had to order some Hornby ones. They sell two types, "standard" and "insulated". The latter are slightly cheaper for some reason, so I went for them. But this was also a mistake, as they fit, just about, but are very flimsy, and a number of them were to snap off during and since construction. I should have got the standard ones. Oh yes, there's another business you have to attend to at the end of each section: the plastic of the sleepers has to be cut away to allow for the fishplates to slide in. The ready-made rail sections come with this at each end, but you have to do it yourself where you cut shorter lengths of track and for all the flexible sections. 

Once finally put together and before ballasting it was time to paint the tracks. The sleepers come in a dark brown plastic, which is a good start, so I just drybrushed them with a grey brown and then a light grey. The rails and "chairs" I painted rust brown then used thinned contrast paint on top, in a black-brown, for shading. When everything was complete I scratched everything off the top edge of the rails to leave the steel surface. At least the painting part of this project was straightforward.


BALLAST BOLLOCKS

Now we come to the really hard part of this project. To start with I had bought a 250-gram bag of grey ballast. But this struck me as probably not enough in fact, and when I tried it out the colour looked "too much grey" with the mainly grey sleepers. Next I mixed up my own  nicely-speckled brown ballast with the granulated cork I use for foliage, but quickly realised it was too flyaway to do the job. So I ordered a larger bag of brown ballast from Javis. 

OK, how do we fix this ballast in place? I was wary of anything that would involve soaking things with water or watery PVA, as I didn't want the mounting card bases to warp. So I was attracted to the product they call "Ballast Magic", despite it not being cheap. It's basically a glue in powder form which you mix with the ballast, scatter and brush the mixture into place and then spray lightly with water. The water then activates the glue and the mixture sets hard. Supposedly... Sounded good, so I sent off for some, mixed and applied it very carefully, and it really doesn't work well at all. Most of the mixture is crumbly at best and falls straight off when dry. I repeated a couple of times, increasing the proportion of powder glue but it's a dead loss. I think the issue may be that the glue powder doesn't mix at all well with the the crushed stone ballast, being a very different granular size and weight. Anyway, this is a crap product. When I had a look at Youtube videos it turned out I wasn't the only one to be disappointed.

So I reverted to an older method, putting the ballast in place, spraying with water to increase the flow, then soaking with a 50:50 mixture of PVA and water, dropped on from a plastic bottle. This was better but there were still bare patches. So I went back and forth over the track sections using more and more heavy-duty methods, stopping only just short of supergluing individual ballast stones in place! Finally I mixed up a "scenic cement" of 80:20 water and matt medium and sprayed this heavily over the whole thing. This did finally lock it all down and matt any shine from the plastic sleepers and the PVA. Of course the bases had warped up somewhat from all the soaking, but they can be straightened out with gradual but very firm pressure. Last of all I applied and drybrushed some patches of static grass along the outside edges and just a few spots between the rails. This added something to the appearance of the finished pieces, integrating them better with the board and figure bases.

If I haven't totally put you off the idea of making some railway lines, please avoid my mistakes! It's probably best to avoid the fishplate issue and just butt the sections together. You don't need to be as meticulous as I have been in avoiding getting ballast on the sleepers. And avoid Ballast Bollocks and stick it down with thinned PVA.





Monday, 7 April 2025

Abattis

 As promised, here's part three of my current project of terrain items for the Franco Prussian War, namely some abattis. What, you may conceivably ask, is an abattis? It's a form of field defence created out of trees, brushwood or branches arranged so that they create an obstacle to attacking enemies.The name abattis comes from the French meaning 'cut down'. The trunk or main branch of each item is placed towards the defending troops, and a tangle of branches and twigs project in the face of any assailants.They were usually built under the supervision of engineer officers and were used from about the 16th century onwards. Barbed wire served the same purpose and mostly replaced abattis, although I've seen photos of this older method in use on the eastern front of World War One 

Generally the cut-down trees were simply dragged into a line, or brushwood and branches were piled into a line. But there were various refinements. Trees on the edge of a wood could be almost cut through and then dragged down to create an obstacle that could not be pulled out of the way by attackers becuase it was still attached to the ground. You may read that the ends of the branches were sharpened, but I think this was actually quite rare. Sometimes the trunks might be fastened down somehow, or the abattis laid in a ditch, to create an obstacle without impeding the defenders view or field of fire. Anyway, not wanting to build something that would fill up my table I went for the brushwood kind of abattis. We'll start with some of the reference photos I found.


Here's an abattis from the American Civil War. This is the "friendly" side.


And the same sort of thing from the enemy side.


My abattis. Frankly I am chuffed with how these came out. They are made from twigs and a few root fibres (see below). I glued them to the bases in layers of a few pieces at a time, which was a bit fiddly. Tacky glue holds such items adequately, but lacks "grab" so you need a bit of superglue in places.


Here you can see better how things are arranged from the rear. The bases are all 50mm deep, cut with irregular, chamfered edges, and in sections 2", 3"and 4" wide. I made 42" in length overall. The bases were grassed before I glued on the twigs.


French infantry defend a length of abattis. You've seen these guys before, but this gives you an idea of the scale of the abattis.


Here's what I used to make the brushwood/ branches, if you fancy having a go yourself. Most of the twigs are this type, which I got a big bag of from Dioramapresepe in Italy a few years back. They keep changing their range, but I'm pretty sure this is the stuff: Mixed twigs for trees, bushes and landscapes Diorama Nativity scene 12 pcs It comes in much bigger pieces than you see here, but breaks apart very easily. I did also use some garden twigs, specifically from box (buxus) bushes, and these might be easier to find. Finally I used some wispy pieces of root, woven in amongst the twigs to give a slightly denser effect. None of these items needed spraying or painting in any way as they are naturally the right sort of colour and texture.

Friday, 28 March 2025

To the Barricades!

With uncharacteristic elan, I am dashing on to the next little part of my project to complete the terrain elements I want for the Franco-Prussian War. This time it's three sections of barricade. As part of preparing a village for defence the roads in the enemy's direction would be blocked off, and cover created to fire from, by building improvised barriers like these. 

The barricades that perhaps spring most readily to mind are those built by revolutionary populations within cities, notably during the Paris Commune of 1870 and the Europe-wide revolutions of 1848. These were actually rather different in construction, because nineteenth-century cities generally had their roads paved with stone blocks. These were laid on sand rather than being cemented together and were the perfect thing  for pulling up and building into substantial stone barriers, from which to resist the forces of oppression!

Anyway, our more rustic barricades were built by sending soldiers into the houses and farms of the village to find what could be piled up to create an obstacle to an enemy charge. What they came back with was piled up higgledy-piggledy, but was enough to give cover from bullets and to give resolute defenders an advantage over anyone struggling to surmount or remove the obstacle. As always when I am building something new, I search online for images that will give information and inspiration, crop and assemble these into a Word document and print it off using the best quality available. This then sits in front of me as I plan and build the item in question. The single best image I found was that of  Le Bourget during the Siege of Paris, and a cropped version is below if you scroll down. Helpfully it is in colour, giving an idea of the different shades of wood involved.


Here's the three sections from the front. The most common materials were wagons/ carts, furniture and storage containers, mostly barrels. You might also see logs and cut timber, wheels, ladders and farm tools such as harrows and ploughs. Doors and shutters could be torn from their hinges for use. Mattresses could feature, usually at the back of the barricade, both for resisting bullets and as something for the defenders to lean against. Illustrators and modelmakers seem to think dead horses were also a component, but I am sceptical as these would quickly decay and produce a horrendous stink.


The same from the back. The pieces do have backs and fronts to a certain degree. I sort of imagined the defenders clambering onto something to fire over the higher parts.


Here is one barricade, defended by Prussian infantry. As with the earthworks these pieces are useful for other periods as improvised barricades must have been built from ancient times onwards, and remained in use notably in the Spanish Civil War of the 1930's, or even street-fighting in World War Two. Strictly, the available material would change; the piece here uses a lot of "bentwood" chairs, which were only around from the mid nineteenth century. But few wargamers will be very picky on such details.


This time the French defend a barrier based on a farm wagon. This wagon was a plastic item from Rubicon Models. It works OK here, but probably a metal wagon from one of the Perry Napoleonic range would have been better detailed and cheaper. Boxes and barrels are available from any number of traders.


The third one is based mostly on furniture, and here the Rubicon Domestic Furniture set is ideal. Building the pieces on bases helps hold everything together. I painted them as the bare earth of the roads. By the way, each piece has some metal barrels or whatever within it, just to give it enough weight not to float out of place on the table. The defenders here are French chasseurs a pied, painted by my friend Garry Broom.


From the defending side. A bit more of an action scene than I usually get around to arranging. That line from the 1964 Zulu film springs to mind here: "thousands of 'em"!


Finally, the best image I could find for reference, the Prussian Guard Grenadiers storming the village of Le Bourget in October 1870 during the siege of Paris. I used a lot of elements from this, but as ever "condensed" to fit the scale of my wargames villages.

The next stage of this project is going to be some sections of "abbatis". I'm still at the planning stage with this, but hopefully will have something to show you in a few weeks time.


Wednesday, 26 March 2025

More Prussians, More Earthworks

Here are some Prussian infantry and artillery painted over December to February, and then a project to build the earthworks needed to refight some Franco Prussian battles. So without further ado...


Infantry Regiment No 50 (3rd Lower Silesian) march out of a Lorraine village.The figures are from the Perry plastic set of course, but with the odd conversion.


Here No 47 (2nd Lower Silesian) advances to the attack. I really like the "advancing at the trail" pose you can get out the plastic sets. There are a couple of metal figures in here and some major conversions, but even without that you can get a very varied unit with no two figures the same. The flag is hand painted, and I cut away the huge streamer that forms part of the set's flag-top, nice as it is, because this regiment only had the 1866 campaign streamer.


The whole brigade storms forward. 


Two four-pounders and a six-pounder (left). These are the three Prussian artillery packs in Michael Perry's range: crews loading and firing for the light gun, loading only for the heavier piece. Even though it was me who built the masters for these two guns, they were a bit of a job to assemble! Locating holes for the more fiddly fittings have got lost in the moulding and casting process so have to be drilled out. The crew figures are in accurate poses for serving the guns and well animated, but I'm afraid some of the sculpting detail isn't the best ever from the Perrys.


This closeup may be a little help to anyone painting these models. The woodwork on the guns was mid-blue, not blue-grey or pale blue as many seem to think, and the seats were all black-painted ironwork (which can't have been very comfy to ride on). The barrels were steel, but chemically treated to avoid rust, producing a dark brown effect. They were supposed to be polished with linseed oil, so presumably had a dull sheen, at least for parades.


Moving on, here's my new batch of earthworks. I have done eighteen sections to add to the four built a couple of years ago and shown then. I used exactly the same method this time, ie triangular sections of blue foam backed with Renedra wattle fencing. Filler and glue provides the earth texture. 


The medium sized sections accomodate two of my bases, which are 45mm wide by 40mm deep. For compatibility I kept the same height as before, ie 20mm. That was designed to fit my older FPW figures from the old Foundry range, but the new figures are a good bit taller. They still just about fit these fieldworks.


The smaller pieces fit a single base of infantry or artillery. Earthworks played a part in many FPW battles. Sometimes the defending French dug themselves in, more or less, and the various sorties from besieged Metz and Paris came up against extensive field fortifications. These included barricaded roads and abattis, both of which are next on my list of projects.


Prussians defend the edge of a fortified village. 

Friday, 24 March 2023

And Fir Trees

 Work In Progress

I've been a bit slow to post, once again, but can honestly claim this is because I've been busy making historical buildings. Not just busy, flat out in fact. What I am working on is the components of Franco Prussian War villages. As I might have mentioned before, the FPW was fought across most of Northern France and the style of buildings was very different in each province. Hence there is no such thing as "generic French" vernacular architecture! You have to choose one area and go for it. I've plumped for Lorraine, as will be explained later, and am busy with the buildings, to be followed by village bases and surrounding walls. To do what I want in terms of quite big battles I reckon I need some twenty new structures, so mass production is under way. The research and planning are done, I've made masters for local types of window, chimney, etc, made moulds and cast almost 400 resin components. Eleven houses are nearly complete at this point. I'm finding it quite a satisfying process, and will get some "WIP" shots when I next take photographs.   

Plans for 2023

Generally I find it's a bad idea to come out with big plans and then fall distinctly short. So most of my goals for 2023 consist of things that were planned but didn't get done in 2022. There's five objectives:

  1. Lorraine villages. Umm, will need some basic railway lines to go with this environment.
  2. Prussian and French staff groups, as mentioned before. Quite a lot of mounted figures, mostly major conversions.
  3. A playing table which looks decent and enables us to set up any configuration of hills and valleys. This will have three elements. Firstly a system of blue foam hill underlays, which I did  actually complete in the New Year. Then a set of boards covered in blue foam sheet which the hills can be pinned to. And finally a good cloth (teddy fur probably) which will cover the whole.
  4. When the Perrys plastic FPW French finally come out I won't be able to resist doing at least a couple of units, though must withstand any thought of replacing huge existing armies of Foundry FPW figures!
  5. The third chateau of the planned trio: less eleborate than the baroque affair, but based on a former medieval castle. Such a chateau featured on several FPW battlefields, and was the prime focus of the Battle of Villepion.
If, if, if I can get this lot done, then I want to move on to a new wargames period in 2024. And have real go at modelling rivers maybe.

The Fir Trees

Finally the pretext for these ramblings, the fir trees which I made along with the previously-seen pines in about 2012. These were mostly made by the "bottle brush" method and then set into short sections of twig for the trunks, the leaves/ needles being static grass. I experimented with one or two different approaches, but they all ended up looking similar. Once again some trees are based and some on pins. 

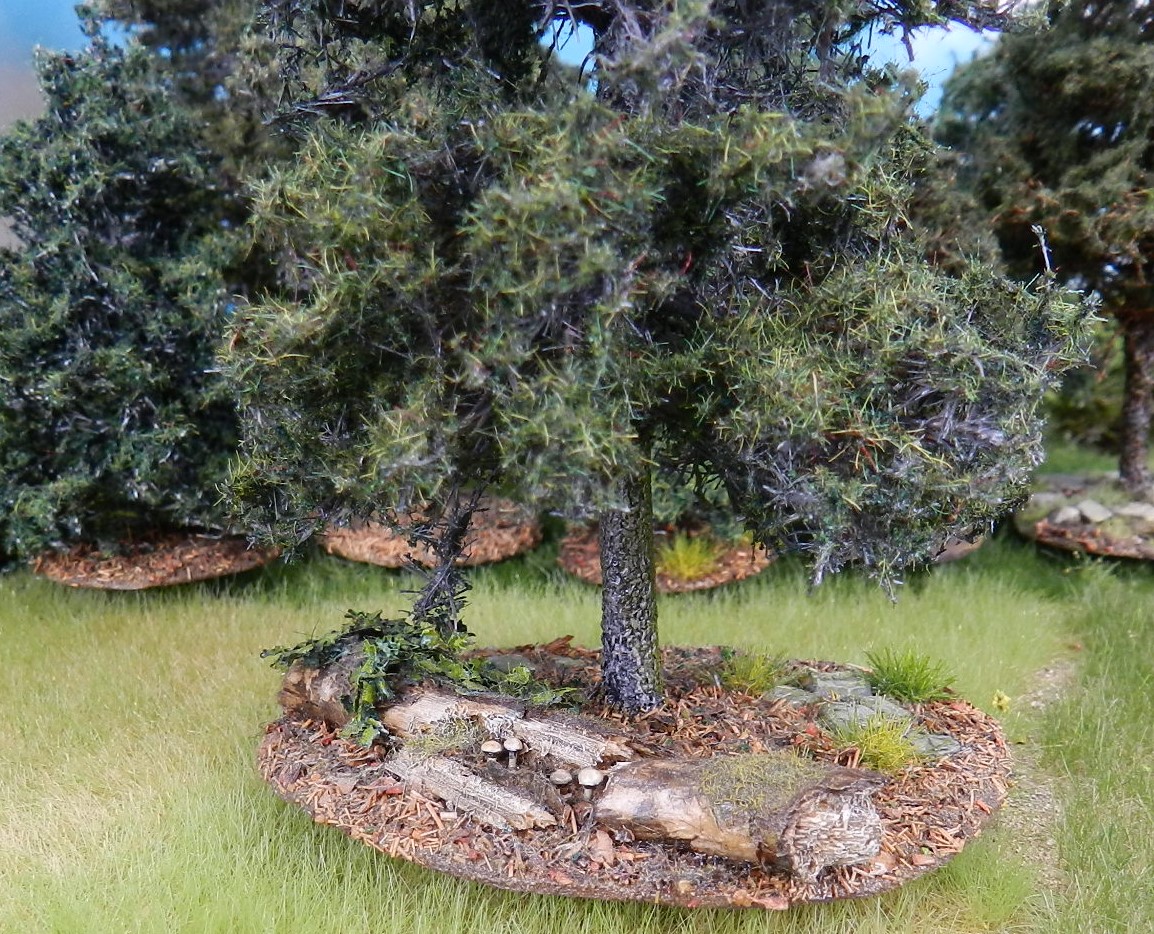
As individual models I wouldn't say these trees are my finest-ever productions, but they group together into woods which look the part. There's a couple of details in the photos below. A pair of trees which appear to grow into one, which seems to be a thing with fir trees. And an eleborate base with a rotting, ivy-covered log and mushrooms! The latter are just the tops of pins, so a tiny detail that's easy to make.

Overall I've got about 40 freestanding pine and fir trees, which go together on flexible wood bases. Because coniferous woods, even more than deciduous ones, are very often on the slopes of hills. It was making these which got me started with using felt for games terrain. I'll photograph the overall effect for the next post.


Tuesday, 28 February 2023

Pine Trees

Hi everyone. Here we are with another post, this time the pine trees I made for the Bohemia 1866 setup. I also made fir trees and the coniferous wood bases onto which both go, which will form the subjects of two later posts. I took the photos of both kinds of trees, then selected and cropped these images before realising I hadn't posed any figures with them. I know you chaps like to see that, but this time we'll have to do without.

I made these trees maybe 11 years ago, and for some reason, perhaps not unrelated to advancing age, I can't remember too much detail about how I made them. Roughly what you are seeing here is trunks made from dowel, topped with branch-ey parts made from twigs and / or Woodland Scenics tree armatures(?) The dead lower branches are lengths of wire, inserted in holes drilled through the trunk. The branches were then expanded by gluing on small pieces of well teased-out rubberised horsehair. The leaves/ needles were mostly static grass. I think I could do that element somewhat better now as I have a powerful grass applicator and could perhaps source short, dark green static grass more easily. But there we are, because I made over 40 pine and fir trees and I'm not fixing to do any more in the near future!

Those who've followed my blog may remember me saying very firmly that I thought it unwise to research individual species of trees, beeches, elms and what-not, because that was a trouble that wouldn't add anything to the appearance of the wargames table. But when it came to coniferous trees I thought this principle needed to be contravened, because we all have at least vague concepts of the things in our heads. Scots pines are one thing, Christmas trees quite another! So I did look into different coniferous types. The upshot is they come in roughly four flavours, at least in Europe: pines, firs, spruce and larch. The latter two have drooping foliage, which could be modelled with the (expensive) materials produced by Mininatur in Germany, but I preferred to stick with the other two. 

So pines are the ones with long trunks and bushy foliage at the top. The lower trunks are greyish and very rough, but that on the upper, growing parts is smooth, and quite a bright brown in colour. So that's what you've got here, as best as I could do it. One more feature that seems common with conifers is dead areas, caused either by insects or by lightning strikes. I modelled one such patch by fixing on a sagebrush twig. As usual I've made some trees on bases and other mounted on pins; both are useful for the wargames wood. 

As I have already photographed the fir trees, a post showing them should be up a bit more promptly than this one. Hopefully a week or two hence.


Saturday, 1 October 2022

You Can't Have Too Many Woods

Work In Progress report: painting of the baroque chateau is only a little forward of where it had reached when I last posted, a week ago. I spent four hours painting the base colour of the stonework in what I wanted to be a beige colour. Don't let anyone, not even an online chart of equivalents between the old and new Games Workshop paint colours, tell you that the modern equivalent of "Bleached Bone" is "Ushabti Bone". It actually comes out not so much beige as the sinister yellow-grey of late WWII German tanks. So four hours wasted. After a repaint it's starting to look nice though, and we modelmakers know that our efforts only begin to look good when they are 95% complete, so not long now! Time for some other stuff...

This post completes my record of the woods project I carried out in 2021. My previous approach to wargames woodlands was shown in a post "The Woods and the Trees", which you can find if you click on the Terrain label in the right-hand column. That method was to build "wood units" with a rigid base and a perimeter of bushes and small trees. That looks good and gives an impression of defending troops being under cover, but disadvantages made me rethink it. There were several issues. The wood units couldn't practically be put together to form a larger wood, never mind overlapped to give a different shape. You were stuck if you wanted a wood to go up the side of a hill, as they very often do in reality. Being about an inch thick, the perimeter of bushes formed a slightly irritating no-man's land in play terms: should you measure ranges from the edge of the wood or where a defending unit stood, a certain distance behind that? It was awkward if a unit's bases straddled the edge of the wood. And fiddlesome to reach down behind trees on the perimeter to get at a unit within. So I decided to make some perimeter-free wood bases, using the flexible felt approach.

Here's the result. One big advantage is that this kind of wood base will lie flat on the board, whatever hills are underneath it. They can go on top of a hill, along the side or part on the flat, part on a hillside, as you see here. In real life, woods are situated disproportionately on hills, because the flat land is where you want to grow your crops. The tree models are a mixture of based ones and pin-fixed, as described in my last post.  The pinned ones can be placed on the very edge of the base, where they are out of the way of figure bases and usefully serve to fix the wood in place. 

If a unit of figures moves into the wood you just move any trees out of the way.It is still completely clear where the edge of the wood is in the game. A unit of figures which is partly in the wood and partly not presents no problem at all in play terms. I should have taken some photos with figures to illustrate this, shouldn't I? 

I made twenty-odd wood bases like this, of all shapes and sizes. Some only fit one or two trees, more copses than woods, which you sometimes need to create a historical battlefield. All these bases easily store in a single shallow fruit-tray, because they all quite thin in section. A useful feature when laying out a game is that the bases can easily be overlapped to get a wood of a specific shape. Because they are thin, the overlap looks acceptable. Again I should have photographed an example of this, but you can see it with the based trees on top of the woodland surface.

Most of the wood bases are covered in patches of grass and patches of leaf litter, which is what the interiors of woods are most commonly like. I made some of the bases with areas of weeds and/ or non-lurid flowers-see the tree bases below. The grass is fairly tall static grass, applied with my applicator. Leaf litter is a "witches' brew" of materials, stuck down with thin PVA. The main components are suitably coloured cork granules and the little leaf things you get from autumnal birch catkins, reduced in size by chopping with a rotary cutter. But the mix also includes sand, tea-leaves and chopped-up plant roots.

Lastly here's acouple of features used on some of the tree and wood bases. First come ivy, which uses foliage material from ModellNatur (left) and MIG (right). Both give a good impression from a normal distance but up close the fibrous material which supports the leaves is a little too prominent. 

These two bases are covered in bushes and foliage serving as weeds. Both are from the Czech firm Polak, who make some really nice scenic stuff, although their UK agent's website is problem-ridden at the moment, so I'm not adding it to my Links section. 


Friday, 23 September 2022

You Can't have Too Many Trees

Work In Progress update: the baroque Chateau is all made now and about 2/3 painted, so it should be ready to show you in a week or so. I would venture to suggest you will like it, as it's one of the most elaborate models I've ever done.

Meanwhile, last year a Franco-Prussian War scenario (the action of Poupry) prompted a major increase in the number of trees I needed, and of wood bases to put them on. We'll look at the wood bases next time, but here's some of the trees. I realised my old wood units ( see The Woods and the Trees under the "Terrain" label) were past their best after 20-odd years of being bashed around, so retrieved those individual trees which could be salvaged. Between those and the new ones, I ended up doing over 50 trees for the gaming table in one go. There's not much point showing you all of them, but here's some of the interesting ones. I've explained how I make trees pretty much before, and will do a proper tutorial at some point, so won't explain the basic method again here. 

Most of the trees are individually based, but some have pins fitted into the trunk instead. The pins go through a wood base or whatever, through a cloth and into a blue foam hill or underlying foam sheet. It takes no longer to push them in than to place a based tree in position.

This tree starts from a twig supplied in bulk by Diorama Presepe of Italy, who are in my Links list. I am a bit of a connoisseur of tree-twigs; this one has a lovely branching and re-branching structure, which is what you want.

Another Diorama Presepe twig, but what I wanted to show you here was the nice foliage on the base, which comes from MIG, the military modelling suppliers. Not cheap, but I think it has a lovely fresh look to it.

Several of the new trees used sagebrush twigs as the basis. Sagebrush grows wild in some very dry parts of the world and gives a great branching structure, bark texture and natural colour for our puposes. It's a bit fragile, but a spot of superglue fixes any breakages. The biggest problem is sourcing it, at least in the UK. In the US people gather it themselves, or buy it easily from model railway suppliers. I think the same applies in Australia(?) But us Brits really struggle to get hold of the stuff. I got a small batch from my fellow terrain-builder Herb Gundt of Indiana long ago, in exchange for some of my own treemaking supplies, and have had it in a bag for many years. It seemed high time to make use of it.

This sagebrush job is pin mounted. A nice upright shape.This is as tall as I like to go with wargames trees, because they have to fit in my storage system of fruit boxes. Long ago I learned to think about storage as part of the planning stage of a model (and of my wargames figures) rather than just making something and then worrying where it's going to go afterwards. I just don't have the space for a more happy-go-lucky approach. 

And this last one shows what a good, twisted, knarly, complex shape you can get with this material. One issue is that some twigs need working on to get a reasonably balanced shape, and you may have to start with the trunk at something of an angle to balance the canopy of the tree. In this case too much of the bulk was still on one side, so I think I brass-rodded a smaller twig on to one point to help balance the thing. But the upshot is one of my favourite tree models.