Back again with the fourth and for now final part of my recent project of building terrain pieces to complete the Franco-Prussian War battlefield. The first three parts were the earthworks, barricades and abbatis. In principle I aim to do three more such mini-projects and then I really will be done for this period. They would comprise (1) a couple of small masonry forts as featured in the battles comprising sorties from Metz and from Paris (2) a third chateau, this time based on a medieval castle and (3) something to represent vineyards. These projects may yet happen, but I've got other things to attend to for now. So my next model will be a master model for Bavarian FPW guns, as part of the Perry range. And then I need to move my actual wargaming boards forward a bit.
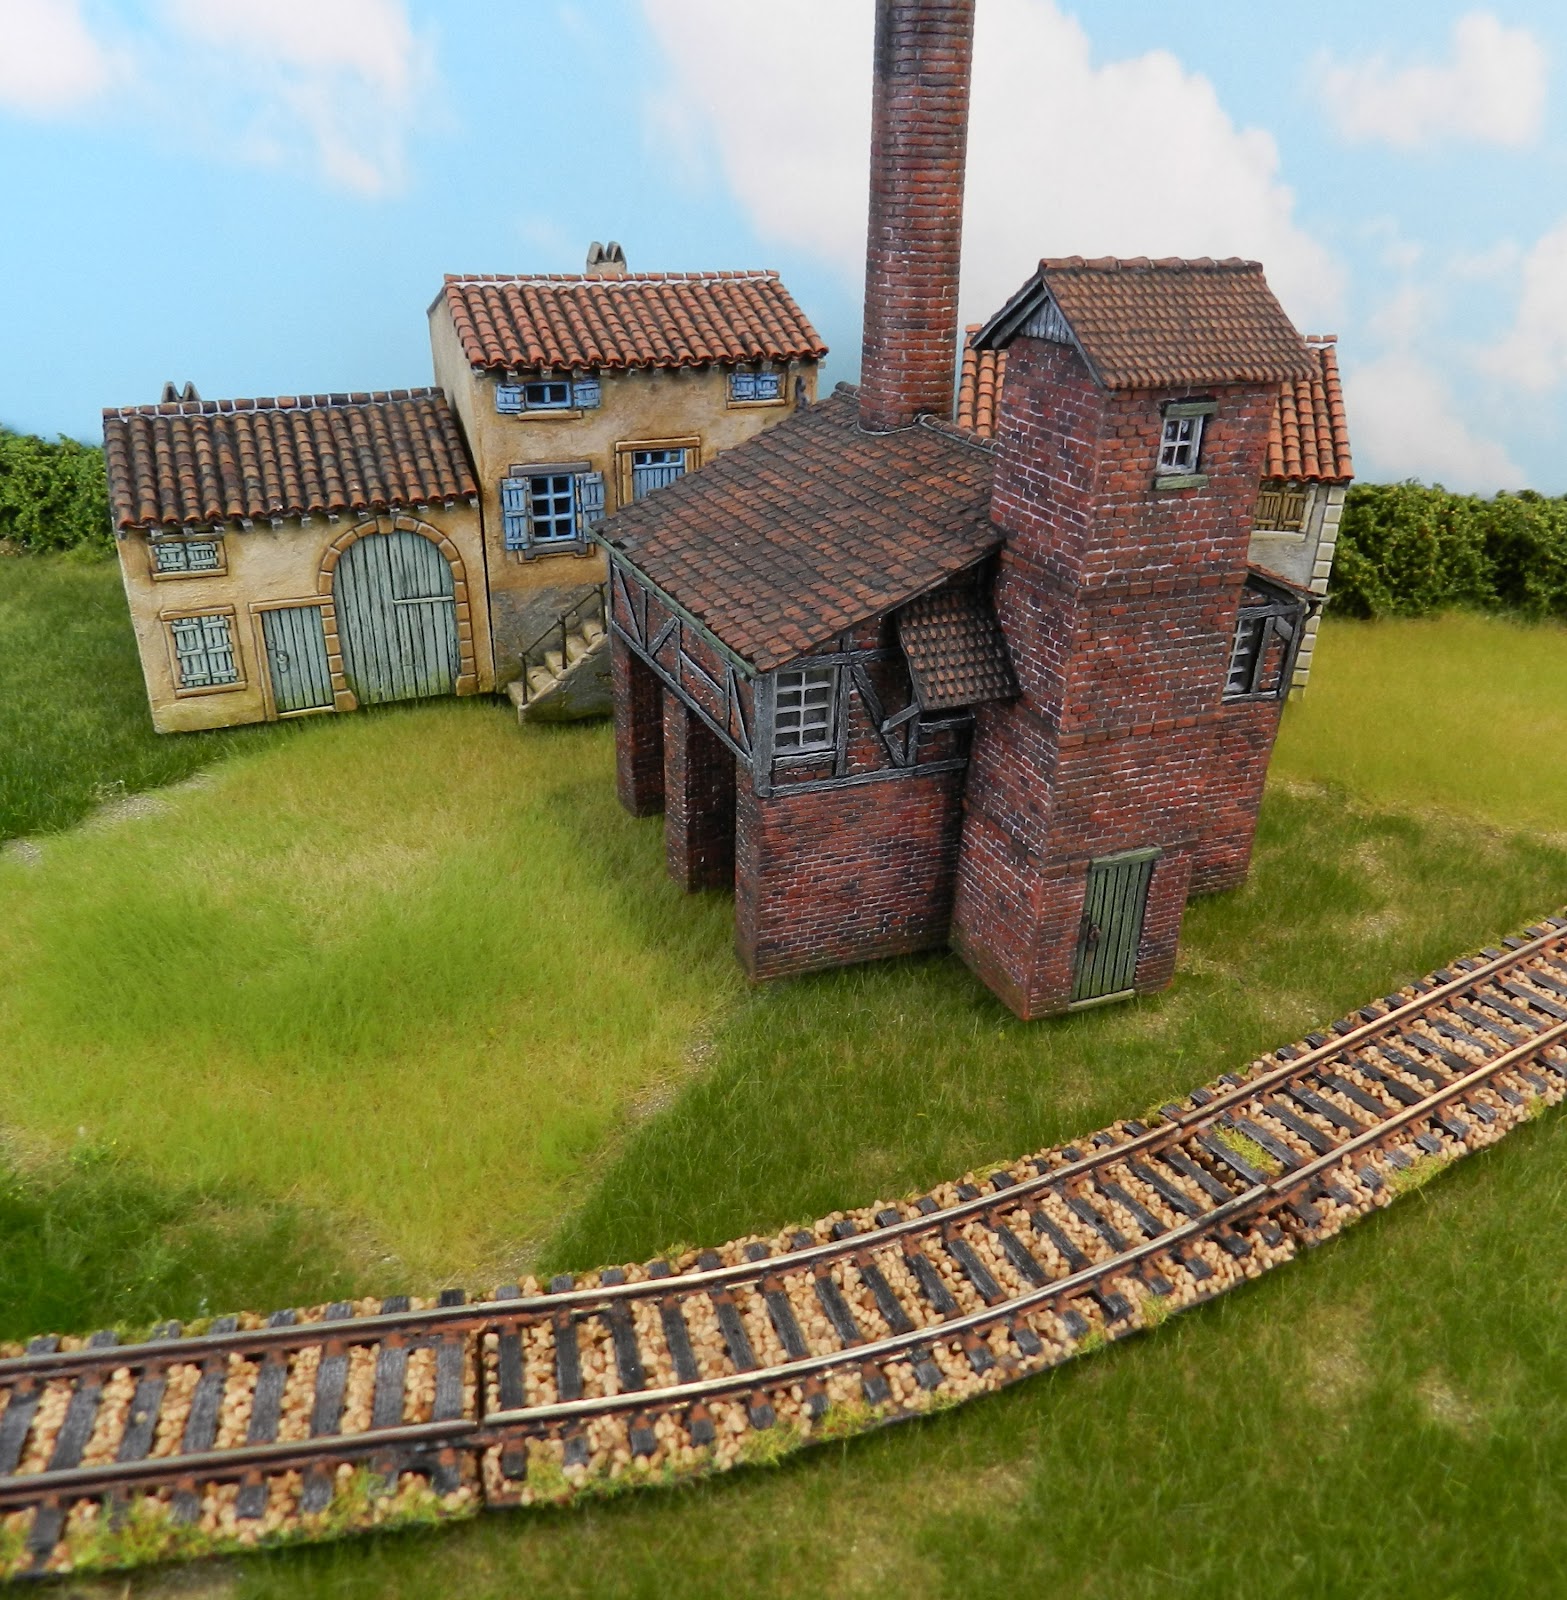
Before getting on to the construction process, a word about railway lines in nineteenth-century wargames. Few European railways except in the vicinity of a station or goods lines were built directly on flat ground. They were mostly either on more or less of an embankment or in a cutting. The effect of both would be to provide cover to infantry but to be impassable to cavalry, artillery, staff or even despatch riders. All these would have to look for the bridge or whatever where a road crossed the railway. In a game you could designate certain lengths of railway as being on the flat, on an embankment or whatever. But my preferred rule of thumb is to consider all railway on flat terrain to be embanked and all on a hill or slope as being in a cutting.
MAKING PLANS
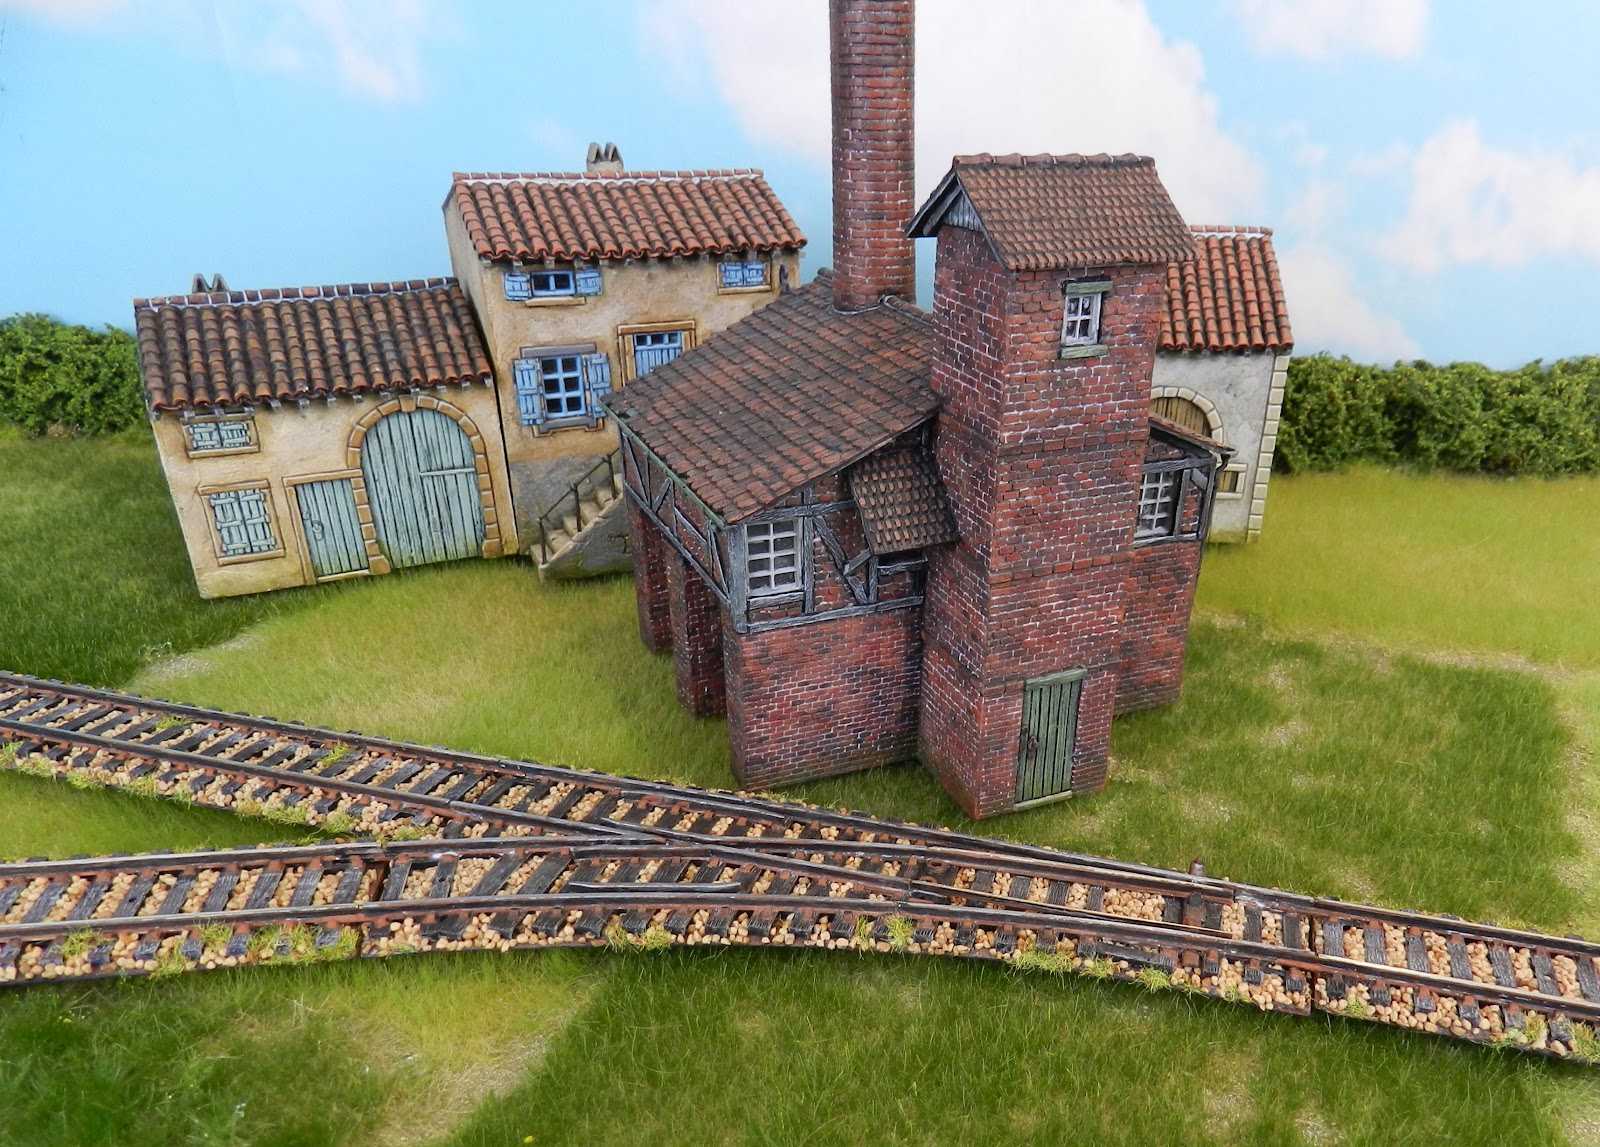
Anyway, here's the freestanding railway lines I've been building over the last six or so weeks. Railways crossed about half the battlefields of 1870-71, and I also wanted to cover what's needed for the battles of 1866 (and these will serve for other periods such as WWII). As ever, the very first step was to work out how much railway line I needed, and any particular junctions/ points and sharp curves. To work this out I used the excellent, clear battlefield maps in Bruce Weigle's rulebooks. I decided I needed maybe 12 feet of straights and gentle curves, some specific curves sharper than railway modellers like to have, an 'X' junction and one or two 'Y' junctions. So about 16' in all, which is quite a length, but I foolishly thought this would be quite simple to make up, using Hornby 00 gauge track. But as regular readers know, I like to moan about how laborious most projects turn out to be, and this one is very much a case in point! I will talk you through the whole process, because you just might want to make some railway yourself and there are some pitfalls I hope you will be able to dodge better than I did.
So why 00 gauge railway, which is supposed to be 1:76 scale when our figures are about 1:56 scale, and might be more closely matched by the larger 'S' gauge, nominally 1:64? Two reasons: firstly there's the issue of compromising between figure scale and terrain scale, as with my "condensed" buildings, and secondly 'S' gauge model railways are more a US thing, hence expensive and hard to get hold of in the UK.
I did wonder about about all sorts of railway-related accessories with this project, but decided against all of them for different reasons. An actual train did puff its way onto one or two FPW battlefields, but modelling one would have been too much of a rabbit hole even for me. A station might have been feasible, but somehow I didn't want to go there just yet. I thought of buffers for the lines that end on the battlefield, but they would be a real obstacle to units on the table. I would have liked to do a couple of signals or indicator boards, just mounted on pins, but sadly couldn't find enough information about their form and colour to model them.
The basic method of construction was to use track sections as they came, or cut them to the lengths required, then base them on mounting card about 1.5mm thick. The width of the sleepers is 29mm and I allowed 2mm each side of that for a chamfered edge, so the bases are 33mm overall. The tracks stick down fine to the bases with UHU, so long as you rough-sand the underside of the plastic sleepers first. The rails are mild steel, but can be cut with a fretsaw or half-cut with clippers then snapped. In either case you will need to file the ends level and smooth. The ideal tool supposedly is the "Xuron track-cutter", sold for this very purpose, and it sounds tough, huh? But as an indicator of the troubles I was to have, mine actually snapped right in two! You wouldn't think this could happen, so I'm disappointed with this product.
The very sharp curves can be made with the flexible track sections that Hornby supply. Unlike the normal track sections the metal rails just slide out of the plastic web of sleepers and "chairs" (railway-speak for the little claws that hold the rails to the sleepers). The web will stick down to your base sections and naturally form an even curve. Now comes a tricky bit though. The rails being mild steel are very springy, so you have to bend them to a curve roughly corresponding to the sleepers and base. Do this with your hands and a pair of pliers, a little bit at a time but using as much force as necessary. It won't be a totally even curve but that's OK. The curved rails will now slide along into the chairs quite easily and you hold them in place with a bit of superglue.
I encountered my first really big problem with getting the ends of the bases to the right length. I made and glued them flush with the final sleeper of each section then found they really needed to be about 1.5 or 2mm longer, as do the tracks. The gap between each sleeper is 4mm, so this should have been obvious, but I missed it.So all the rails had to be torn off the bases, sanded clean, new bases made and stuck together a second time.
The next troublesome area was the "fishplates" as they call the little clips that join model railway track sections together. I could have left this aspect out and just had the sections butting up against each other, but I figured they might drift apart on the table, so I'd use the fishplates and have everything joining up nicely.. I needed to buy a couple of dozen of these little accessories, so looking into it I ordered a 24-pack of PECO OO/HO "fine standard" fishplates. These absolutely don't fit the Hornby track however, so were wasted and I had to order some Hornby ones. They sell two types, "standard" and "insulated". The latter are slightly cheaper for some reason, so I went for them. But this was also a mistake, as they fit, just about, but are very flimsy, and a number of them were to snap off during and since construction. I should have got the standard ones. Oh yes, there's another business you have to attend to at the end of each section: the plastic of the sleepers has to be cut away to allow for the fishplates to slide in. The ready-made rail sections come with this at each end, but you have to do it yourself where you cut shorter lengths of track and for all the flexible sections.
Once finally put together and before ballasting it was time to paint the tracks. The sleepers come in a dark brown plastic, which is a good start, so I just drybrushed them with a grey brown and then a light grey. The rails and "chairs" I painted rust brown then used thinned contrast paint on top, in a black-brown, for shading. When everything was complete I scratched everything off the top edge of the rails to leave the steel surface. At least the painting part of this project was straightforward.
Now we come to the really hard part of this project. To start with I had bought a 250-gram bag of grey ballast. But this struck me as probably not enough in fact, and when I tried it out the colour looked "too much grey" with the mainly grey sleepers. Next I mixed up my own nicely-speckled brown ballast with the granulated cork I use for foliage, but quickly realised it was too flyaway to do the job. So I ordered a larger bag of brown ballast from Javis.
OK, how do we fix this ballast in place? I was wary of anything that would involve soaking things with water or watery PVA, as I didn't want the mounting card bases to warp. So I was attracted to the product they call "Ballast Magic", despite it not being cheap. It's basically a glue in powder form which you mix with the ballast, scatter and brush the mixture into place and then spray lightly with water. The water then activates the glue and the mixture sets hard. Supposedly... Sounded good, so I sent off for some, mixed and applied it very carefully, and it really doesn't work well at all. Most of the mixture is crumbly at best and falls straight off when dry. I repeated a couple of times, increasing the proportion of powder glue but it's a dead loss. I think the issue may be that the glue powder doesn't mix at all well with the the crushed stone ballast, being a very different granular size and weight. Anyway, this is a crap product. When I had a look at Youtube videos it turned out I wasn't the only one to be disappointed.
So I reverted to an older method, putting the ballast in place, spraying with water to increase the flow, then soaking with a 50:50 mixture of PVA and water, dropped on from a plastic bottle. This was better but there were still bare patches. So I went back and forth over the track sections using more and more heavy-duty methods, stopping only just short of supergluing individual ballast stones in place! Finally I mixed up a "scenic cement" of 80:20 water and matt medium and sprayed this heavily over the whole thing. This did finally lock it all down and matt any shine from the plastic sleepers and the PVA. Of course the bases had warped up somewhat from all the soaking, but they can be straightened out with gradual but very firm pressure. Last of all I applied and drybrushed some patches of static grass along the outside edges and just a few spots between the rails. This added something to the appearance of the finished pieces, integrating them better with the board and figure bases.
If I haven't totally put you off the idea of making some railway lines, please avoid my mistakes! It's probably best to avoid the fishplate issue and just butt the sections together. You don't need to be as meticulous as I have been in avoiding getting ballast on the sleepers. And avoid Ballast Bollocks and stick it down with thinned PVA.